Friday, October 30, 2009

Handmade Shoes


Look at these shoes! I made the uppers from hand- quilted sweatshirts, the mid-soles were pipe insulation foam, and the soles were wide mountain bike tires.
Here is a link to an article with photos of the tops of these shoes.

Tuesday, October 27, 2009

Lasercut fabric anemones


Today I lasercut this fabric and sewed these anemones! They are about 6 inches in diameter. I have so many other ideas and plans for constructing different voluminous forms with lasercut fabrics!

Above is a piece of sheer fabric after lasecutting, and before being disassembled.

All of the textiles objects in the title photo of this blog (the picture of me at the very top) were sewn by hand from fabrics that were cut by hand. Lasercutting these pieces today saved me a few days of careful handwork, and these cuts are more precise than what I might do by hand.

Monday, October 26, 2009

Food in Japan


I've been reading Kenny Shopsin's EAT ME for the past few days. What a gem he is! Follow this link and scroll down to hear Kenny!
Earlier today the sunlight streaming in was so golden and this was our view from the window, the waterfall heavier from yesterday's rains. I cooked so much-- butternut soup, custardy (gluten free) french toast, rice and millet flour pancakes, fried eggs with avocados.

This was a meal that Mary and I made last year. I've been studying traditional Japanese cuisine for many years now. This year I finally made umeboshi with plums that I picked in California and pickled in Rhode Island.

I was in Japan to do glass work when 2005 turned into 2006. I stayed and worked in Kyoto the most, but also Tokyo, Kobe, Osaka, and Nara. In Kyoto I walked to Nishiki Market everyday. The market is about five blocks long and several centuries old, a cacophony of sounds as well as flavors and smells from over 100 vendors.

At one end the narrow market opens into a mall. There I found this imagawayaki shop where this beautiful and dulcet- sounding machine produces adzuki- filled cakes. At the end of the linked video you can see someone trimming the edges of the cakes with scissors.

Everyday I also walked to this mochi vendor in Gion, on Shijo- dori.

Everywhere plastic food is found in the windows of restaurants. I didn't think this looked appetizing, just beautiful because the orange roughy on top has such an enormous eye.

Plastic bento boxes

Plastic sushi (handrolls on the top shelf)

Plastic curry rice (kari raisu) in a train station (Note how the middle plate on the bottom row looks angry!)

I tried an omuraisu (omelette/ rice) shop in the mall at the end of the Nishiki Market. This came with a cup of corn chowder, a small salad, and a fried chicken cutlet. The plate was about as wide as a computer keyboard!

Supermarkets are full of fascinating things, like packages of octopus tentacles

huge turnips

and depending on the market and the time of year, you might encounter extraordinarily expensive fruits. When I was there the exchange was 83 yen to the dollar, which means that the fruit in this photo (top quality to be purchased and given as New Year's gifts) cost:
$5.23 for one kiwi
$4.38 for one orange
$13.07 for one mango
$43.80 for fifteen strawberries

Saturday, October 24, 2009

Pyrex


When I started flameworking 12 years ago, one of the first things I tried to assemble was a jointed glass doll. I had small jointed porcelain dolls in mind, like ones that were made in England and Germany from the mid- 1800s to the early 1900s.

Pyrex is a trademarked name for borosilicate glass. "Boro" (from borosilicate) is also known as "hard glass" because it is more resistant to thermal and physical shock than "soft glass." Soft glass is usually of a soda lime composition, and it has a lower melting temperature than hard glass. Initially, it took me some time to adjust to the fact that some glass could be described as "soft" and, even if glass is 1600 degrees it might still be called "cold" (because it might not be hot enough to flow.)

Above and below are some things that I flameworked in Pyrex. My fingers are in the photo for scale, but mostly because these things wouldn't hold themselves up to be photographed. At the top is a small face that I want to frame with silver and colored soft glass. The other 2 photos are of a tiny jointed glass robot.

These are arms for a jointed glass action figure.

These are the head and torso for a jointed glass action figure.

When working in Pyrex, I use almost only colorless clear glass. I know that when a lot of people see my glass work they assume that it's plastic or painted clay, especially if the colors are bright. Also, some people do no believe me when I tell them at a sale(!) that I make the chains out of glass. I don't want (right now) to make brightly colored chains that look even more like plastic to some.

These are glass chains. I flameworked every link individually in 2 millimeter Pyrex.

This glass chain is a form study for a strap I want to attach to a glass chain maille dress.

This is a fake septum ring that I call "The Jack Frost." I think it's funny that this jewelry makes a nose look runny.
In white it's, "The Milk Snort," in red it's, "The Nosebleed," in green it's, "The Virus," in black it's, "The Chimney Sweep."

Friday, October 23, 2009

Productive in different ways


Today I acquired a lot of food for free, particularly pie & ornamental pumpkins, butternut squash, and avocados.


Because there was so much, we shared a lot with our friends. Also, I prepared large amounts of delicious victuals. 3 pounds of baked asparagus and 6 pounds of sauteed pears with ginger and spices. In between all of that, I dyed my friend's hair.

Who wants to make pies together?

Wednesday, October 21, 2009

About me and glass


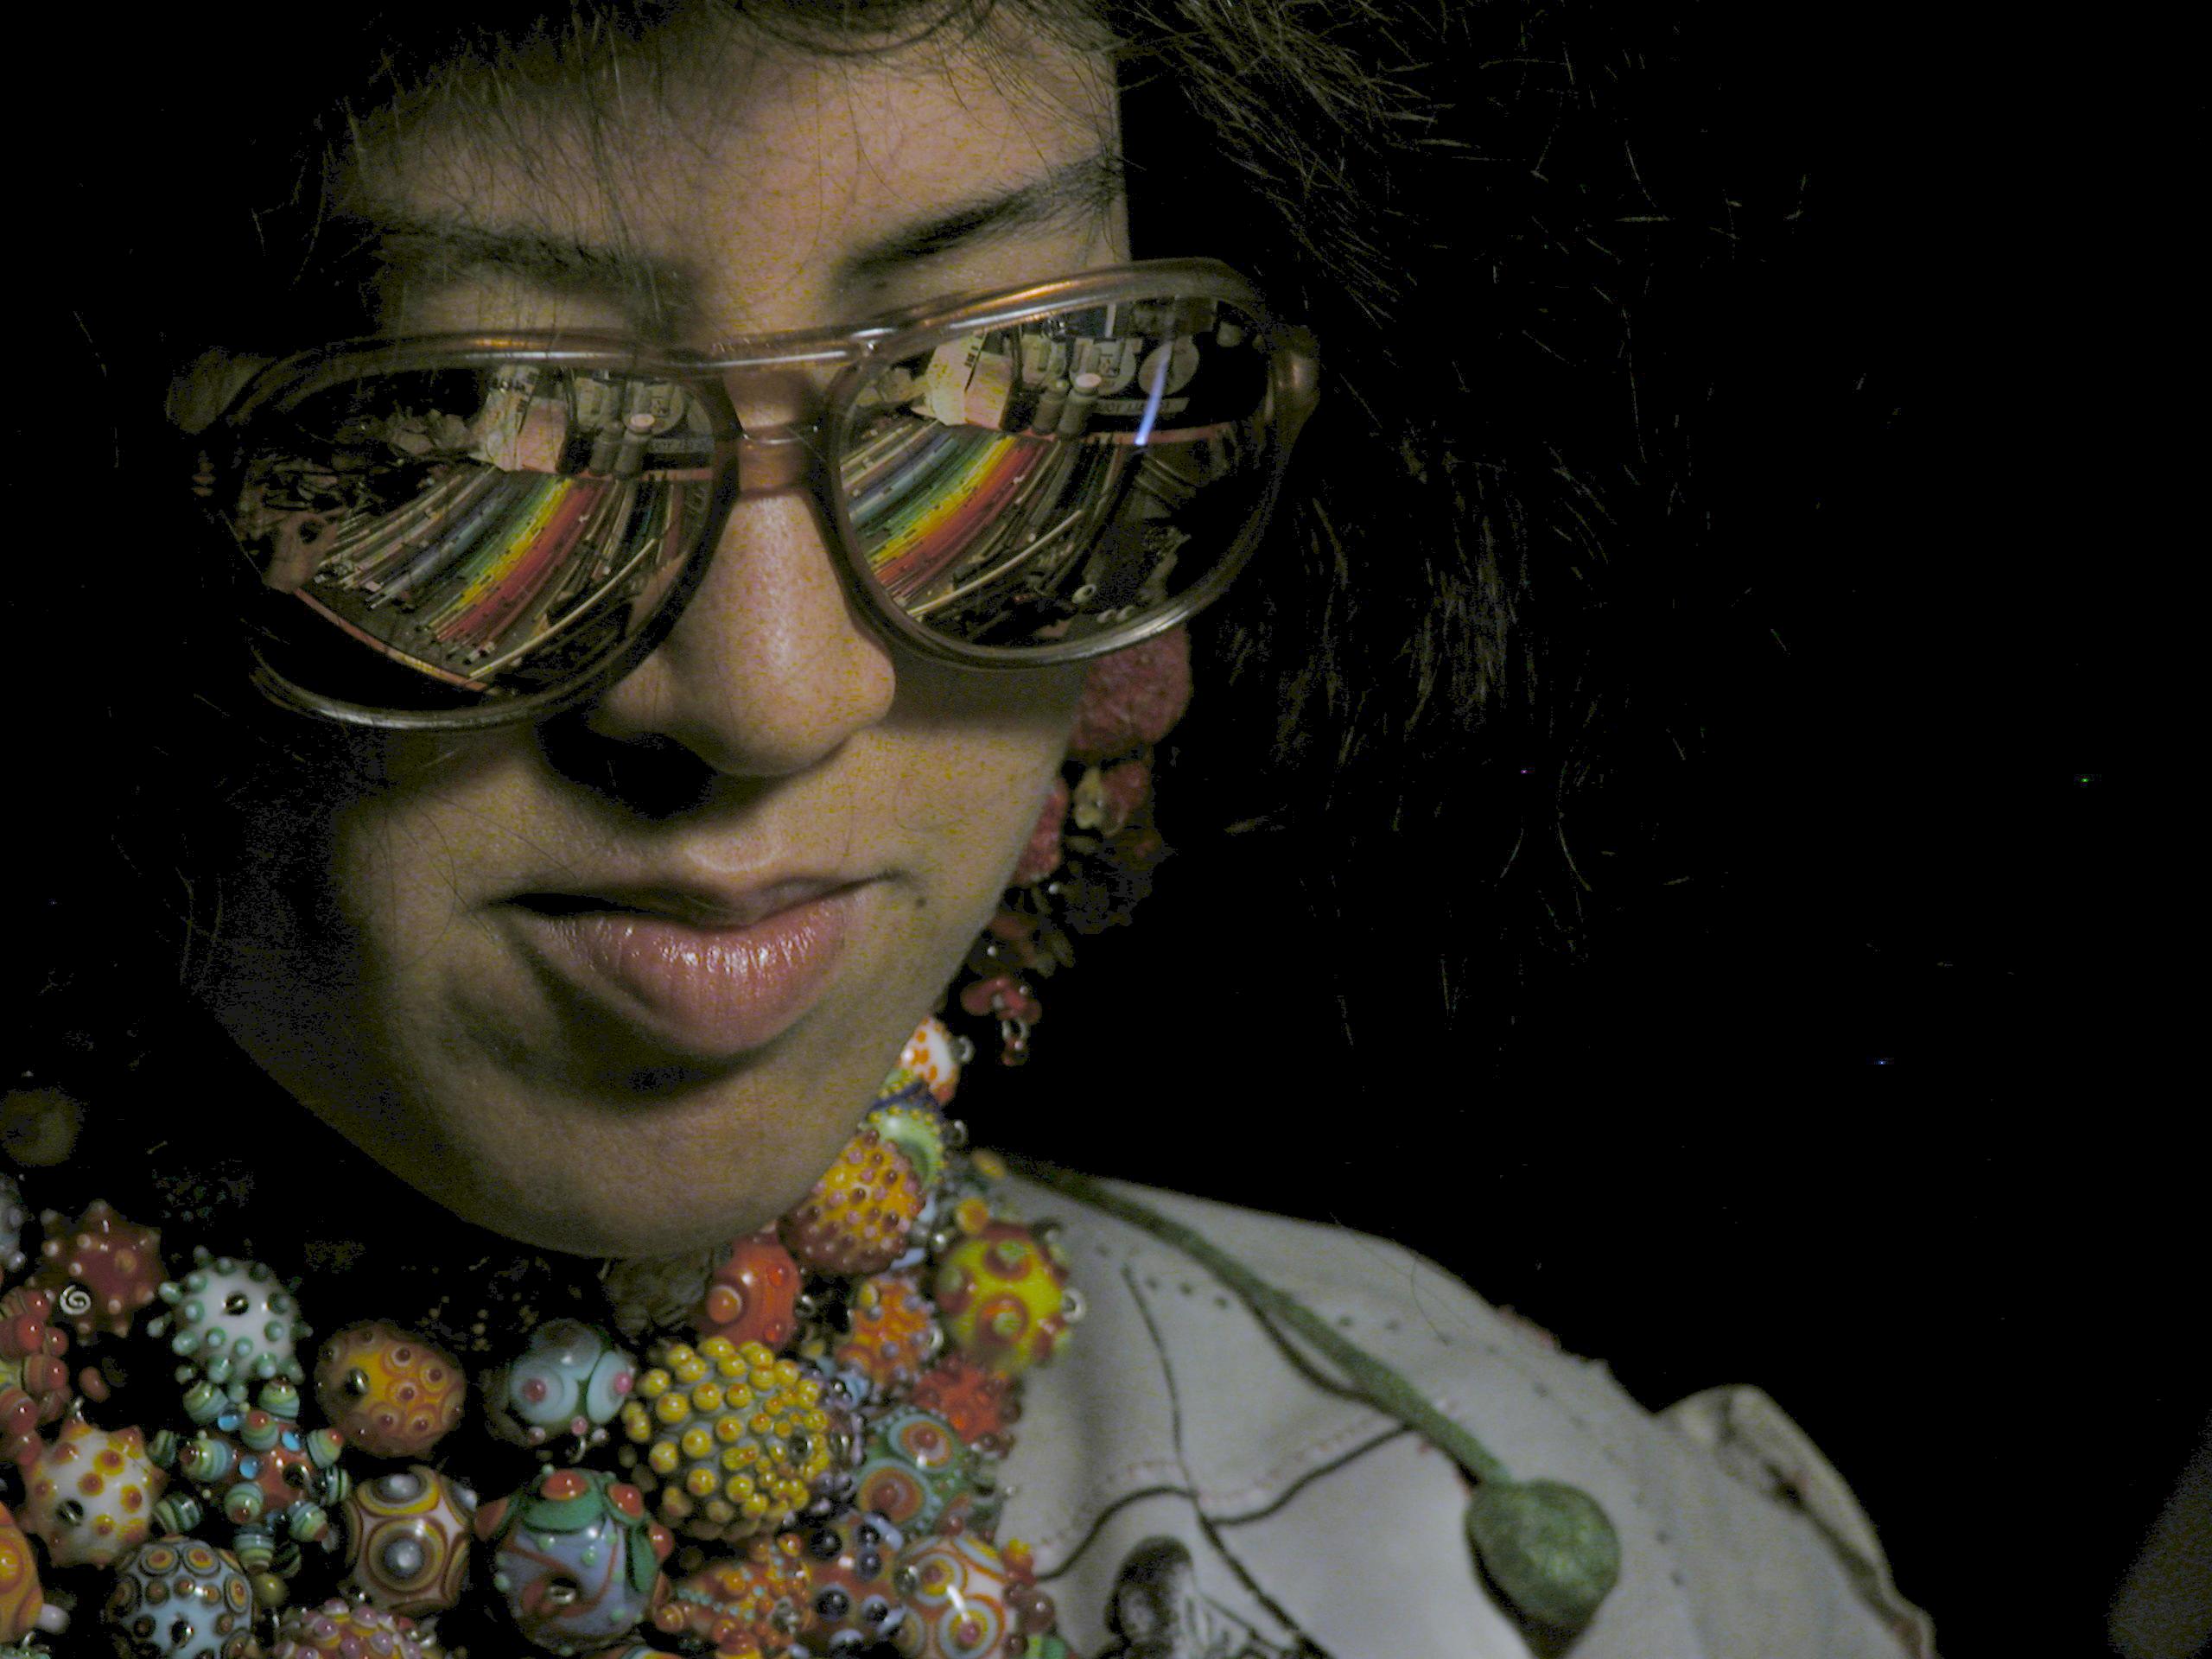
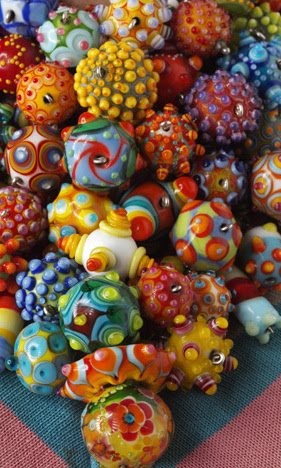
Though I make a lot of different things, flameworking (or lampwork or torchwork) is what I do the most to pay my rent. I want to teach a lot more but it's hard to break out of the cycle of applying for craft shows, and making production work instead of challenging myself more with the massively ambitious projects that have been ruminating in my mind for years-- not yet actualized.
My schedule usually includes a lot of traveling to sell work. Now I'm so glad to be in the Fab Academy because I'm learning how to do things I've wanted to know for years, and it's requiring me to stay put here in Providence.

This is my huge neck party, which has been evolving over 12 years. It doesn't get bigger anymore-- I just switch out beads as I make ones that I like more. I'm saving the old ones for a mosaic that I will one day make as a sink backsplash. The necklace is on a lattice of sterling silver and it's lined with silk on the back. I think it weighs 4 or 5 pounds.

I taught myself lampwork by ordering a kit in the mail, "Everything You Need to Make Glass Beads" for $99. Pictured above is the Hothead torch that I started with and my hand for scale.
(This is a special torch designed just for lampwork. I have some links to suppliers and educational resources on my website.)
After learning with the kit I transferred from the Maryland Institute, College of Art to the Rhode Island School of Design, where I got a degree in Glass. Unfortunately, RISD didn't really teach torchwork, but I learned so much and I loved going to school there.

The process is analogous to drawing in three dimensions, mid-air, with molten glass.

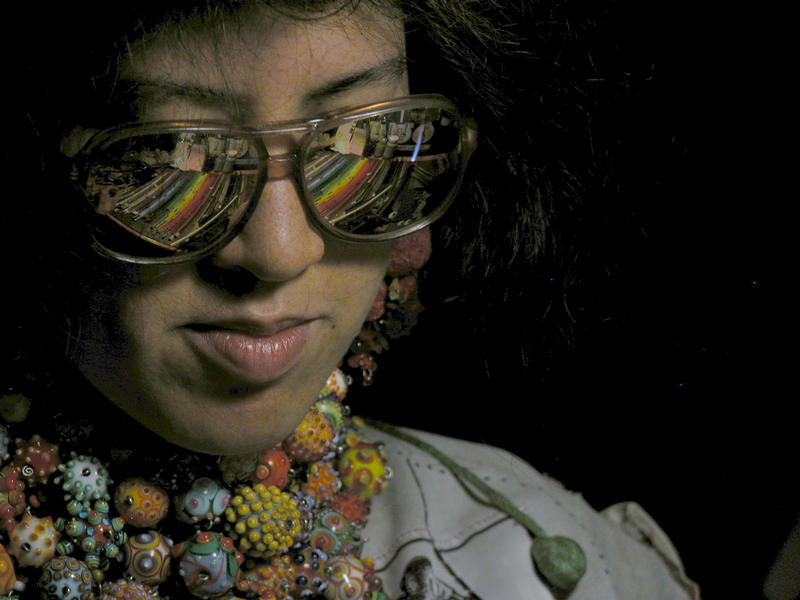
The 2 photos above were taken by Dave Fischer. I wear those didymium lens glasses to protect my eyes from the sodium flare of the flame. Who wants to burn out their retinas? A condition exists called "Glassblower's Cataracts." One can do damage from just one day of work, and it might not show up for 10 or 15 years! Staring into a gloryhole (a 2400 degree furnace) is a lot more intense than staring at a soft glass torch, but both can potentially be damaging if one isn't careful.


This is my desk, just before assembling pieces for a show.

Tuesday, October 20, 2009

Variations and pom- poms

I like spending a long time working on one project. I like how things evolve over time. Sometimes if I love a particular idea, I'll make variations of it.

It started with earrings similar to these about 6 years ago. I traded one of my glass beads for 2 pairs of rough pom- pom earrings. They eventually fell apart and I made these with sterling silver to replace them. I added glass bees that were made by Kim Fields to make them feel more floral.

Next I made this pair. The large pom- pom at the top of each earring is made mostly of wool, and the rest of the pom- poms are made of unraveled Japanese bunka cord. I made all of the pom- poms by hand, and I flameworked all of the glass bees, as well as the beads at the bottom of each earring. Click on these, there are a lot of details in them.
Somewhere over the years I lost track of these, my favorites by far. A perfect example of why you should document what you make! Mom, have you seen these in the house in New York?

I wanted replacements, so I decided to make these while in LA last year. I didn't know where to find really fine fibers out there (like bunka cord), so I used some wool yarn from a craft store. I only made two pairs like these, and Faythe Levine has the other set.

This year I started making another pair while in San Francisco. These are still unfinished. The pom- poms are all bunka cord, but there's hardly any size gradient or variation in color. Also, there aren't any glass components yet. I'll post another image after they're more dynamic!

Whoa, I just did a little research and it seems that most tutorials on the innernerd show how to make pom- poms ONE AT A TIME. When most people I know make pom- poms, they make a bunch of them. Why make them one at a time when you can work more efficiently:

For small to medium sized pom- poms, drive 2 nails into a board until they feel stuck and won't give much under sideways pressure.

For more or bigger pom- poms use a bigger board and bigger nails. Also, you can make pom- poms across a room by winding around a doorknob and the back of a chair, or a hook on a wall.

Wind your fiber around the two nails. The fiber should not be so tight as to draw the nails in towards each other. Continue until the yarn is sufficiently thick, considering the diameter of the pom- poms you're trying to build.

Using a strong thread (linen works well,) tightly tie belts at intervals close to the desired diameter of your pom- poms.

Cut on the midpoint between each belt, and trim around the cut yarn to make spherical pom- poms!

As with most applications, thicker yarns build up faster. These were made with really bulky yarn, like 1970s hair ribbons.

Monday, October 19, 2009

A frustrating day in the lab

This morning I attempted to lasercut a branch into thin slices, but either it wasn't cut all the way through, or it completely charred. Then I wasted a lot of time trying to accomplish one small task because I couldn't find the appropriate tools to use. The lab is fairly diorganized and both rooms get utilized by so many people that things are constantly being moved around. Because most things don't yet have places where they belong there aren't true locations to return them to. Yet.

I'm getting on the torch now to make glass eyes for dolls, both to use in the semester project diorama(s) as well as to bring to the Los Angeles sale in January.
I made all of the dolls below. I flameworked the glass eyes and glass teeth, I sculpted the faces and the bodies, sewed the clothing, made the wigs, flameworked the jewelry.

A trapezist with a tiny flameworked necklace

Swella, a doll purse

My biggest one yet- she's about 4 feet tall.

Sunday, October 18, 2009

Finished book


I finished binding a new book, and the shoulder strap is long enough for me to wear over my head. This way I can bike with it and I won't need to carry a bag.

The cover fabric is a really reflective jacquard weave, and I made a strap from an old satin necktie. The strap closes itself with a magnetic clasp, (which is easy to repurpose from an old purse.) I plan to use the strap to hold pens against the book.

This endpaper is reused giftwrap in a gumball print. Most of the pages are blank sketch paper.

This endpaper was acquired in the Philippines, and most of the papers on this side of the book are graph paper.